Purging old data from your ARM database, generating reports and more
This article will help you get more from the Globalscape EFT Advanced Reporting Module (ARM). It includes a guide to purging your ARM database, tips on generating reports and more. This will help administrators get more from their EFT solution.
Purging old data from your ARM database
ARM is an optional module with over 40 pre-configured reports and a visual custom report designer. It has everything you need to perform a file transfer audit. EFT stores every transaction, file transfer and administrative change as an entry in the ARM database. But as a result, databases get very large. With so much data to filter, reporting can take longer than usual. Keeping your system clear improves response times.
Globalscape provide two scripts to help purge your database of “old” entries. These are stored under the “SQL Server” folder of your configuration, and are called PurgeSQLEFTData.sql and Fast_SQLPurge.sql .
PurgeSQLEFTData.sql will remove data older than 60 days from your database in 100,000 row “blocks”. This has a relatively low impact on your database.
Fast_SQLPurge.sql just cleans up everything in one process which – depending on the amount of data in your database – can put a significant load on your server. The ARM database stays active throughout the process and if it stops accepting connections for any reason, all transactions will be written to a file which will be streamed back into the database when the connection is re-established. This will not impact your users uploading and downloading data to your server.
But before purging your database you should make sure that any data needed for compliance and auditing purposes is backed up accordingly. Your Database Manager should be able to advise on the database backup retention period.
Preparing the PurgeSQLEFTData script for use
If you wish to change the number of days the purge will date from, then change the default “60” in the line “SET @stopTime = DATEADD(DAY, -60, GETDATE())” to the required number of days. So, for example, if you wish to delete data more than 30 days old, change this to 30.
Once this is done, save the script and you can run it against the database.
Automating the script using EFT
Building this as a “command” inside EFT would use the command line similar to
C:\Program Files\Microsoft SQL Server\100\Tools\Binn\SQLCMD.exe
and the parameters of
-E -i “C:\ProgramData\Globalscape\EFT Server Enterprise\SQL Server\PurgeSQLEFTData.sql”
If you use SQL Authentication for your database then replace the –E with -U <DBUsername> -P <Password>
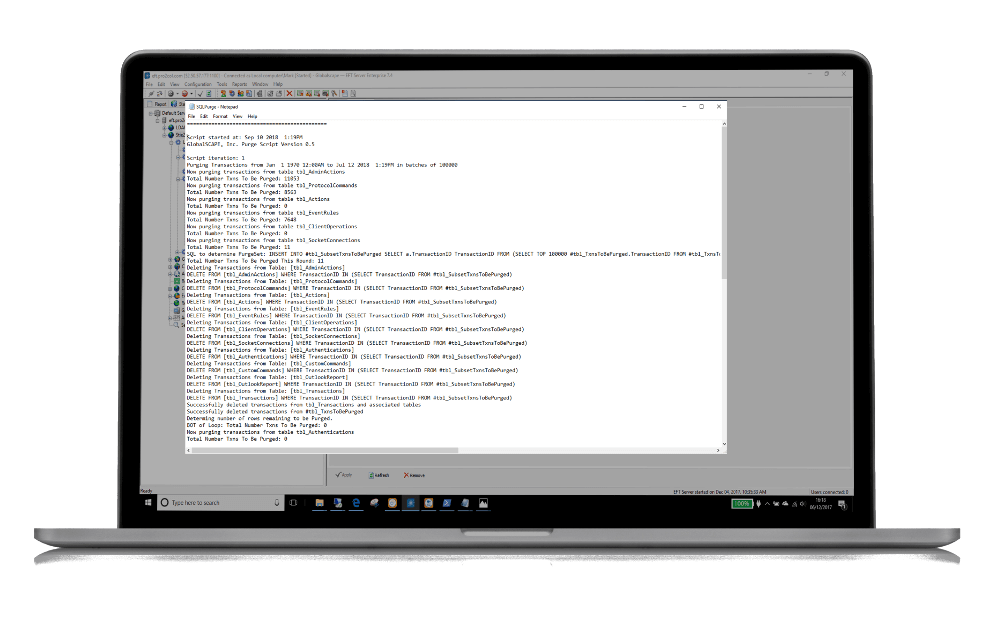
The output of the file can be written to a text log file so you can see how many records have been purged from the database.
Build this command into a scheduled Event rule and EFT will keep its own database purged back up as needed. If you have EFT Enterprise or the Scheduled Timer Module for EFT Express, you can build this command into a scheduled Event rule.
When we ran this against our demo system, we cleaned up over 300,000 rows clearing nearly 70% of space. The savings on a production system should be even better.
How to Generate a Summary Transmission Report in EFT ARM
Email notifications can be triggered by EFT when files arrive, but out of the box, it doesn’t produce a consolidated report of all files transferred in a single notification. If each transfer only contains a couple of files, this is manageable, but it becomes a nuisance if a transfer includes 2000 files.
Outlined below is a quick route to manage reporting on large volumes of files in a transfer, based on a recent customer proof of concept.
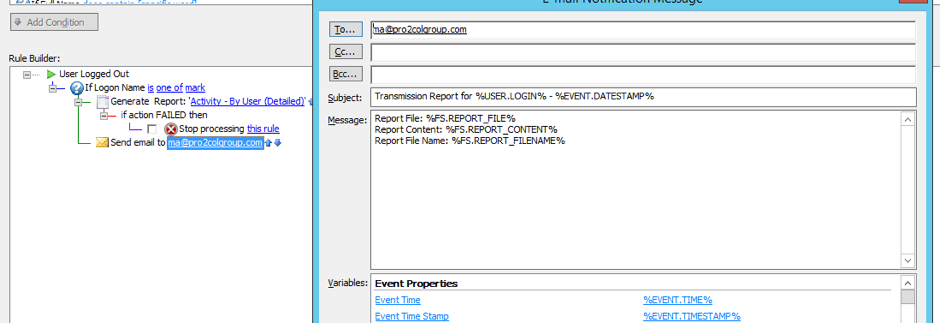
The first is to isolate an “event” that will trigger the rule once all the transfers have been completed for example the “on user logout” event.
The next stage is to configure the rule to run a report of all the files transferred today by the user. This catches all the files that were uploaded. The report we used was the “Activity by User (Detailed)”.
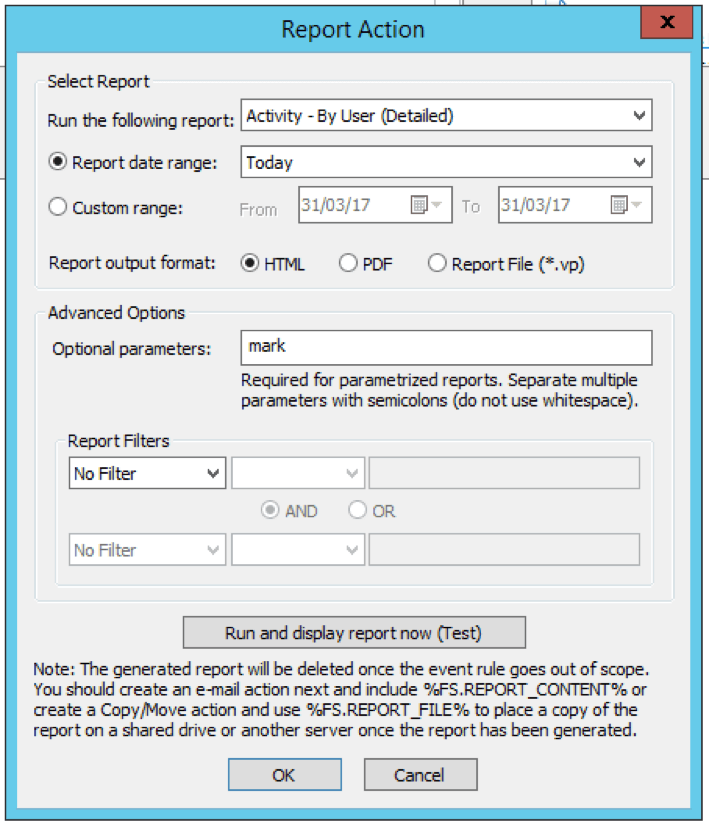
The report parameters can be customised to meet your requirements. For embedding the contents of the report into an email, it is best to set the report output to HTML.
A “send notification email” step can then be added using the macro %FS.REPORT_CONTENT% to embed the output of the report into the email.
Remember to consider:
Transmission timings.
If the transmission starts late in the evening and finishes after midnight, change the report date range to “last 24 hours” instead of “today”.
Multiple transmissions.
If the user sends multiple transmissions per day, then the report will contain all the files sent for the user that day. This may clutter the report up with file names which are not relevant.
Size of the report
If the report is very large, consider replacing the content of the report in the email with a link. This is easily done by replacing the %FS.REPORT_CONTENT% variable with %FS.REPORT_FIELNAME%.
Our EFT health checks keep your system at optimum performance. A technical consultant will carry out these and other checks and offer configuration options to better manage your server. Find out more about EFT health checks now.
Compare MFT solutions:


EFT Modules